by Nicole Johnson, MFA, CHHC | Adrenal Fatigue, Anti-Inflammatory, Digestion, Fatigue, Gut Health, Health and Wellness, Illness, Immune Health, Kidneys, Nutrition, Prevention, Recipes

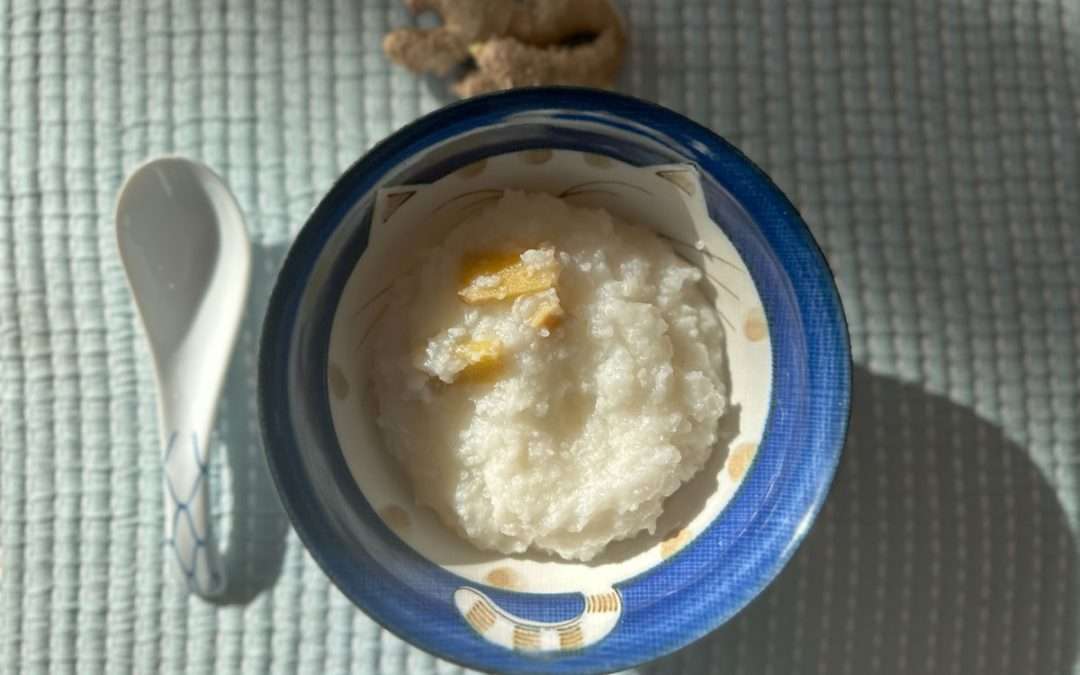
Photo credits: Congee imagery courtesy of Nicole DiDio Johnson
Ginger congee for winter is a warming, restorative recipe that supports Kidney and adrenal health during the colder months.
Coming from our newsletter and want the recipe only?
Jump straight to the recipe
Winter, the Kidneys, and Why Food Matters Now
In East Asian Medicine, winter is associated with the Water element and the Kidney system, a framework recognized by organizations such as the National Certification Commission for Acupuncture and Oriental Medicine. This system governs our foundational vitality, stress resilience, sleep quality, and capacity to recover rather than simply push through.
By January, many people are unknowingly drawing from adrenal reserves. We see this in the clinic even in people who otherwise feel healthy.
Common winter patterns include:
• Fatigue that doesn’t fully resolve with rest
• Feeling colder than usual, especially in the low back or feet
• Digestive sluggishness or reduced appetite
• Light or unrefreshing sleep
• A sense of being tired but wired
Winter is not the season to demand more from the body. It’s the season to protect reserves and rebuild.
Why Ginger Congee Helps in Winter
Congee is a slow-cooked rice porridge used for centuries as a therapeutic food. It supports winter recovery because it is warm, simple, and easy to digest.
Why we recommend it:
-
Minimal digestive effort, which helps conserve energy
-
Gentle warmth and circulation support
-
Steadier nourishment during stress and fatigue
-
A calming effect for the nervous system
-
Especially supportive during winter depletion patterns
Ginger Congee Recipe
A simple, restorative winter staple.
Ingredients
- 1/2 cup white jasmine rice (or short-grain white rice)
- 6 to 8 cups filtered water or light broth
- 1 to 2 tablespoons fresh ginger, finely grated or thinly sliced
- Pinch of sea salt
Optional additions
- Soft-boiled egg
- Shredded chicken
- Steamed greens
- Sesame oil
- Scallions
Instructions
- Rinse the rice until the water runs mostly clear.
- Combine rice, water or broth, and ginger in a pot.
- Bring to a boil, then reduce to a low simmer.
- Cook uncovered for 60 to 90 minutes, stirring occasionally, until creamy.
- Add a pinch of salt. Top as desired. Serve warm.
Clinical Uses of Warming Congee
We might recommend congee:
-
During periods of high stress or disrupted sleep
-
When appetite is low but nourishment is needed
-
As part of winter Kidney and adrenal support plans
- To add and support warmth in the body (especially when icey drinks are prevalent.)
Food can support the deeper regions of the body, extend the effects of treatment, and support steadier recovery over time.
When to Seek Extra Support
If fatigue, anxiety, insomnia, pain, or digestive issues are lingering or worsening, it may be a sign your system needs more support than rest alone. Many patients explore acupuncture and massage for stress and fatigue as part of their winter care plan.
Our winter treatments focus on nervous system regulation, pain relief, and steady energy restoration. If you would like help choosing the right next step, we are here. Click here: (828) 333-5087 to get started with a phone call.

by Nicole Johnson, MFA, CHHC | Anti-Inflammatory, Health and Wellness, Nutrition, Prevention, Recipes
Here’s a healthy, tasty recipe that will bring into you in the summer mode. This is a popular favorite from our Seasonal Cleanse. It’s great food to travel with and requires NO COOKING. Rejoice the Rawko! It’s like a taco but it’s raw – not raw meat – raw foods (means no cooking, more enzymes, more energy, packed with flavor). We’ll admit, it can be a bit of an odd concept at first but once you try them, you may just be pleasantly surprised.

Make the Wraps
- 1 Bunch of collard greens* There is a misunderstanding that collards are bitter, not so! Pair them with a protein and a fat and eat them raw and your will be forever changed.
- Rinse and de-stem – leaving 2 halves (depends on how many people are eating– figure 2-3 wraps per person)
- Pat those dry
Sweet Cucumber Salsa
- 1 apple – peeled, cored, diced
- 1 cucumber – peeled, seeded, diced
- 1 medium sweet yellow onion – diced
- Parsley and/or cilantro – washed and diced
- A few pinches of Himalayan or Celtic sea salt (these are quality high mineral salts)
- Fresh squeezed lemon
- Add all ingredients together, then add in salt and lemon – make sure it really gets on that onion! Toss, let sit.
Rawko “meat”
Why the non-meat tacos – er- rawkos? Because they are delicious. Because raw foods pack an amazing amount of energy and vitality, and because everyone loves new and exciting foods that make them feel good with no negative repercussions. So here you go:
- 1 -2 cups of raw organic walnuts (again, depending on how many people you are feeding)
- 2-6 TBS of gluten free tamari (go easy on this — it can get real salty quick)
- Add to a high speed blender or food processor and blend it up
Making Rawkos
- Lay your collard wrap on a flat surface
- Spread 1-2 tsp of the rawko “meat” onto the wrap length-wise
- Add some salsa (this offsets the heavy flavor of the walnuts nicely)
- Here, I added some sunflower sprouts for some more green and texture
- Roll up and enjoy.
You can pre-roll these and eat them on a car ride — or pack the ingredients separately and take to go and assemble on site. Enjoy!

by Nicole Johnson, MFA, CHHC | Adrenal Fatigue, Anti-Inflammatory, Digestion, Fatigue, Gut Health, Immune Health, Kidneys, Liver, Nutrition, Prevention, Recipes
Golden Milk is a delicious and nourishing drink that packs incredible health benefits into one warm mug at a time.
It’s very
Some of the wonderful benefits of Golden Milk:
- Anti-inflammatory – easing joint pain
- Soothing to the spirit and aids in digestion and sleep
- Supports healthy liver function
- Supports the spleen and stomach
- Supports healthy blood sugar levels
- Supports the heart and brain
- Supports a healthy immune system
- Supports the nervous system
The key Ingredient in Golden Milk is tumeric – which is a powerhouse. Curcumin is the most active ingredient in turmeric – It’s a strong antioxidant is anti-inflammatory, antibacterial anti-fungal. However, curcumin is not well-absorbed into the body — UNLESS it is blended with black pepper. Black pepper contains piperine which has it’s own anti-inflammatory properties. The black pepper enhances the curcumin ability to work synergistically with the body. Golden milk is blended with other herbs and spices for flavor and health benefits. Once you begin to get the hang of it you can add your own favorites in.
You can drink Golden Milk 2- 3 times per day. I prefer it before bed. You can make a homemade version with our recipe below or purchase a mix. We have used Gaia Herbs brand and it is wonderful – with the added benefit of Ashwaganda. Ashwaganda is an adaptogen which helps the body deal with stress. That said, you can certainly add that into your recipe.
Delicious Golden Milk at Home
- 1 cup Milk or Dairy Free coconut milk (regular, full-fat, canned)
- 1 cup water
- 1 tablespoon coconut oil (can use MCT coconut oil)
- 1½ teaspoons ground turmeric
- ¼ teaspoon ground cinnamon
- ¼ teaspoon ground ginger
- ¼ teaspoon ground cardamom (optional – to taste – I love cardamom and addition to almost everything)
- ⅛ teaspoon ground black pepper
- if sugar sensitive sweeten with 10 drops liquid pure stevia extract, or to taste
- OR Sweeten with raw honey to taste after removing from heat
- In a small saucepan over medium-low heat, whisk together the coconut milk, water, coconut oil, turmeric, cinnamon, ginger, and pepper. Warm slowly until hot but not simmering, about 7 minutes
- Remove the pan from the heat, and whisk in the stevia or honey (not both!)
- Leftovers can be refrigerated for up to three days

by Nicole Johnson, MFA, CHHC | Adrenal Fatigue, Fatigue, Gut Health, Health and Wellness, Immune Health, Kidneys, Nutrition, Prevention, Recipes

Homemade Bone Broth is deeply nourishing to the body.
It supports gut health, skin hair and nails and nourishes our deepest organs- the kidneys. This is food as medicine. Bone broth is a fantastic source of many gut-healing, anti-inflammatory agents. Healthy, pasture-raised and grass-fed animal bones and joints are rich in amino acids, gelatin, collagen. These components support the health of your bones, joints, and skin.
Collagen is an essential building block for a healthy gut lining. With homemade bone broth you can help repair damage by ingesting collagen-rich foods and supplements such as bone broth and hydrolyzed collagen powder.
It is important to source healthy and humanely raised pastured and grass-fed animals – so that you getting the healthy benefits of this traditional food.
Here is the simple recipe for chicken bone broth we make at home. There are other bone broth recipes you can find with a simple search (lamb, beef and fish).
Simple Homemade Bone Broth (Chicken)
- 1 chicken back
- 6 -12 or more chicken feet (this is an important ingredient as this is where much of the dense gelatin resides)
- 1 bay leaf
- 14 Cups of clean spring water (chlorine and fluoride free)
- 3 TBS of Himalayan salt or Celtic Sea salt
- 1 TBS of raw Apple cider Vinegar
Directions:
- Add all ingredients to Instant Pot or crock pot
- Add in apple Cider Vinegar – let sit for 1 hr – this helps leach all the nutrients and minerals out of the bones
- Instant Pot: Set on High Soup 120 mins
- Crock pot: Cook low and slow for 18-24 hours
- Stock Pot – stove top: Turn to a simmer and put lid on pot and let it simmer for 18-24 hours
When done pour through a tea strainer over the mug or bowl. Add other ingredients as desired. We like the broth just this way. But you can add other ingredients before or after cooking.
- Garlic (crush and let sit for 15 min before adding in or cooking with it as it activates the healing benefits)
- Fresh Ginger
- Squeeze of fresh lemon
- Celery, onion, carrot, etc.
- We will also use it to make soup. We like to sauté the holy trinity of onions, garlic and celery – add diced carrots, beets and broth.
With the instant pot – we keep the broth going on warm for a few days and serve hot from there straining as we serve.
Process from the stove top or out of the Instant Pot or Crock pot:
- Turn off and let cool for 30 min to hour, then lift out all the bones/veggies and set aside
- Pour the broth through strainer to filter out all the grit into another bowl
- Cover and refrigerate. The fat will separate and rise to the top.
- Remove from fridge and you may now skim off the fat with a large metal spoon (some leave the fat on). The broth should be jelly-like which is WHAT YOU WANT – it means it is loaded with collagen and gelatin.
- You can now put a wide mouth funnel over a few mason jars.
- Put up to 3 days worth in the fridge and freeze the rest. It only stays fresh for about 3-4 days. You can freeze it for up to one year. PLEASE NOTE: Only fill mason jars for the freezer 75% when frozen the broth will expand and the jar will crack.
Benefits of Homemade Bone Broth
- Gut Health: The dense gelatin in bone broth is a vital nutrient for healing the gut
- Aids Digestion
- Improves joint health.
- Strengthens your immune system
- Anti-Inflammatory
- Anti-aging
- Makes your hair, nails, and skin glow
- Can improve sleep
Simple Homemade Bone Broth (Chicken)

- 1 Vhicken back
- 6 -12 Or more chicken feet ((this is an important ingredient as this is where much of the dense gelatin resides))
- 1 Bay leaf
- 14 Cups Clean spring water ((chlorine and fluoride free))
- 3 TBS or less of Himalayan salt or Celtic Sea salt
- 1 TBS Raw Apple Cider Vinegar
-
Add all ingredients to Instant Pot, crock pot, or stop top
-
Add in apple Cider Vinegar – let sit for 1 hr – this helps leach all the nutrients and minerals out of the bones
Cooking Method
-
Instant Pot: Set on high/ seal – Soup for 120 mins
Crock pot: Cook low and slow for 18-24 hours
Stock Pot – stove top: Turn to a simmer and put lid on pot and let it simmer for 18-24 hours
When done pour through a tea strainer over the mug or bowl. Add other ingredients as desired. We like the broth just this way. But you can add other ingredients before or after cooking.
- Garlic (crush and let sit for 15 min before adding in or cooking with it as it activates the healing benefits)
- Fresh Ginger
- Squeeze of fresh lemon
- Celery, onion, carrot, etc.
- We will also use it to make soup. We like to sauté the holy trinity of onions, garlic and celery – add diced carrots, beets and broth.
With the instant pot – we keep the broth going on warm for a few days and serve hot from there straining as we serve.
Process from the stove top or out of the Instant Pot or Crock pot:
- Turn off and let cool for 30 min to hour, then lift out all the bones/veggies and set aside
- Pour the broth through strainer to filter out all the grit into another bowl
- Cover and refrigerate. The fat will separate and rise to the top.
- Remove from fridge and you may now skim off the fat with a large metal spoon (some leave the fat on). The broth should be jelly-like which is WHAT YOU WANT – it means it is loaded with collagen and gelatin.
- You can now put a wide mouth funnel over a few mason jars.
- Put up to 3 days worth in the fridge and freeze the rest. It only stays fresh for about 3-4 days. You can freeze it for up to one year. PLEASE NOTE: Only fill mason jars for the freezer 75% when frozen the broth will expand and the jar will crack.

by Nicole Johnson, MFA, CHHC | Health and Wellness, Nutrition, Recipes
This is one of our family’s favorite recipes. In fact, it is my go-to potluck dish. Made with seasonal ingredients, it’s easy to whip up, tastes indulgent, and will keep you healthy and satisfied.

Healthy,Vibrant Goddess Slaw
1-3 Apples – shredded – Choose green apples for lower glycemic impact
1 large Beet – shredded
3-4 Carrots – shredded
Optional – can add scallions or green onions to taste if desired
Combine with avocado oil or extra virgin olive oil – 1 – 2 TBS, salt & pepper to taste
Add squeeze citrus juice of choice – I combine a squeeze of orange with lime – or whatever I have on hand
You’ll want to coat it but not have it swimming in juice.
Let sit for a bit for flavors to combine
Enjoy!
Goddess Slaw

Easy, tasty salad or side dish
- 1-3 Apples – shredded – Choose green apples for lower glycemic impact
- 1 large Beet – shredded
- 3-4 Carrots – shredded
- Optional – can add scallions or green onions to taste if desired
-
Combine with avocado oil or extra virgin olive oil – 1 – 2 TBS, salt & pepper to taste
-
Add squeeze citrus juice of choice – combine a squeeze of orange with lime – or whatever you have on hand
- You’ll want to coat it but not have it swimming in juice.
- Let sit for a bit for flavors to combine

by Nicole Johnson, MFA, CHHC | Health and Wellness, Immune Health, Nutrition, Prevention, Recipes

Let Stinging Nettles Help You – In So Many Ways
The Nettles plant – Urtica Dioica (commonly known as Stinging Nettles) is an interesting herbal ally. If you look closely, the needles on the leaves will let you know that it WILL sting you, if you are not mindful when harvesting. However, once the Nettles is dried, blanched, or pulverized, the sting is ameliorated. Best harvested with gloves starting in early spring, Nettles can provide us with a treasure trove of support for many conditions. However, regular use provides the biggest benefit in the long run.
This wonderful plant is safe to use, and is high in calcium, iron potassium, phosphorus, chlorophyll, vitamin C, and other nutrients. Nettles support the kidneys and adrenals making it a potent stress fighter when used regularly. It is alkalizing and anti0inflammatory helping us with joint pain, osteoporosis, PMS, hot flashes and skin conditions like Psoriasis. Nettles contains more Calcium and Magnesium than the RDA (Recommended Daily Allowance).
Nettles Works Synergistically with the Body
Nettles has an adaptogenic effect on the body. Nettles can simultaneously
- Bring Healing to Dryness OR Drain Dampness
- Gentle OR Fierce
- Hemostatic OR Circulating
- Nutritive OR Dispersing
- Cooling OR Building Energy
Could Nettles be an Antidote for Coffee?
So much about coffee is alluring. The smell, taste and ritual of morning and/or afternoon coffee. Coffee and conversation with a friend. Coffee is string medicine. Because of this, it takes a toll on us when we consume it regularly.
I would not normally think of using Nettles to replace coffee. When I retreat (yes retreat! ) from my coffee habit, I generally move to Decafe coffee, then black tea, then green tea, and then once I’ve weaned from caffeine and I want that coffee taste, I drink either Dandy Blend or Four Sigmatic’s Mushroom elixir. There are a few to choose from – just don’t choose one with actual coffee in it. These are both fairly good substitutes for the coffee taste. Both are fairly nutritive, especially the mushroom elixir. Yet how can we repair the damage we’ve done with coffee.
Since going deeper into my studies of Nettles, I am convinced that Stinging Nettles power plant ally that can help heal the imbalances we create with regular coffee use. Take a look.
Coffee Vs. Stinging Nettles
| Coffee |
Nettles |
| Depletes Minerals |
Increases Minerals |
| Acid Forming |
Alkalizing |
| Stress on the Adrenals |
Restores the Adrenals (Especially the seeds) |
| Liver Toxicity – uses the same path that stress needs to clear) |
Liver Supportive |
| Pregnancy Risk |
Pregnancy Supportive |
| Dehydrating |
Helps Hold Hydration |
Regular use of Nettles can repair and restore the acidity and depletion that occurs from regular use of coffee.
Stimulating vs. Energizing – You get to Choose
Coffee and other caffeine products don’t really “give” us energy. They stimulate our system – but this is at the high cost of our adrenal glands. While the effect may be what we want (after all, I can get a lot done after a cup of coffee) the toll on our health is too great. When we tax our body this way, we are depleting our “jing” or essence.
Nettles, on the other hand, energizes our body and it’s many systems. It does this by nourishing our system and working synergistically with it. In fact, Nettles seed is considered an adaptogen – working to support the adrenals by nourishing and strengthening the HPA-axis – this is the Hypothalmic-Pituitary-Adrenal relationship. Adoptogens are herbs that help your body deal with stress. Other wonderful herbs in this category include Ashwaganda, Hawthorn, Schisandra, Rhodiola, Ginseng, Gingko, Astragalus, Holy Basil, and more.
70% of people Suffer with compromised Adrenal function due to stress.
Nettles for Women
Nettles can support us through all phases of the moon cycle including menopause.
- Helps relieve cramps due to stagnation.
- They are loaded with chlorophyl which moves the blood, increasing circulation.
- The Hemostatic action also helps regulate and balance blood flow, lightening heavy flow and nourishing light flow.
- Nettles supports us with pain during ovulation and helps regulate excess water, relieving bloating.
- Excellent for Menopause as they are cooling and anti-inflammatory.
- Great for Pregnancy – it’s like a liquid multi-mineral – Best mixed to use Nettels tea on and off with Red Raspberry Leaf tea (tones the uterus).
Other Amazing properties of Nettles
- Bone Building Nutrients: Nettles carry 15 out the 18 Bone Building Nutrients including Boron which helps maintain and stabilize calcium in the bone.
- High in bio-flavonoids which reduces varicose veins
- Nettles is very supportive to all of the tissues and membranes of the body
- Replenishes energy and builds you back up
You can use the entire plant. Leaf, seed, stalk and root.
Uses of the Seed:
- Supports the kidneys and adrenals
- Builds stamina and lasting energy reserves
- Thyroid support
- Use the seed oil for Alopecia
- Also use for Erectile Dysfunction
- Makes a great hair oil (crush in oil)
Eat the seeds raw or if using daily – dried (as the raw can become overstimulating).
The seed and Root can be tinctured as well as the leaf.
Uses of the Root:
- Anti Inflammatory for Prostatitis
- Great for gout- clears uric acid
Stinging Nettles is a smart plant and it helps your membranes be smart as well. It increases the health of your blood and helps revitalize you and flush out old patterns. It is commonly advised to brew
How to Start using Nettles Daily
You can purchase a tincture at your local health food store. Another easy way to start with Nettles is using it as a tea.
Nettles Tea (Infusion Method)
Nettles tea works best as an infusion
- 2-6 TBS Dried Nettle Leaf (You can purchase online or directly through us at the office)
- 1 Quart Filtered or Spring water – NO fluoride or Chlorine (Feel free to make more – adjusting the nettle measurement)
- Organic Milk or Non-dairy Alternative
- A few drops of liquid Stevia
- Add the nettles in the jar
- Fill the jar with hot water just off the boil for tea
- Tightly close the lid and allow to steep for at least 8 hrs up to 24 hrs. – I make this at might and let sit over night. I also make more in the morning for the evening.
- Strain the plant material out squeezing well
- Enjoy warm or over ice. We enjoy it With organic milk or non-dairy milk of choice and a few drops of liquid stevia.
- Refrigerate and drink/use within 24 hours
Other Ways to Take in Nettles
The following are best for fresh spring nettles. Be sure not to eat fresh nettles after it has gone to seed – this can be too taxing on the kidneys.
- Nettles Soup
- Nettles Pesto
- Juicing the Nettles – You can drink the juice or use it directly on the skin
- Add it into Smoothies
- Nettle Chips (make like Kale chips)
